1.2.2 Understanding Genome Compiler's Terminology
This tutorial is aimed at giving a high level overview of the Genome Compiler Syntax and specific sections are referenced within to find more details.
Files are referred to as "Projects"
- Throughout this user manual the term "project" will be used to describe each file you create/import to the material box.
- Each project and imported project (see section 1.4) consists of the sequence data and associated features, annotations and metadata, such as any weblinks or notes/comments connected to the project.
The "Main" DNA layer
Each project has a "main" layer of DNA sequence to which actual features and annotations are assigned to (Figure 1.2.2.1).
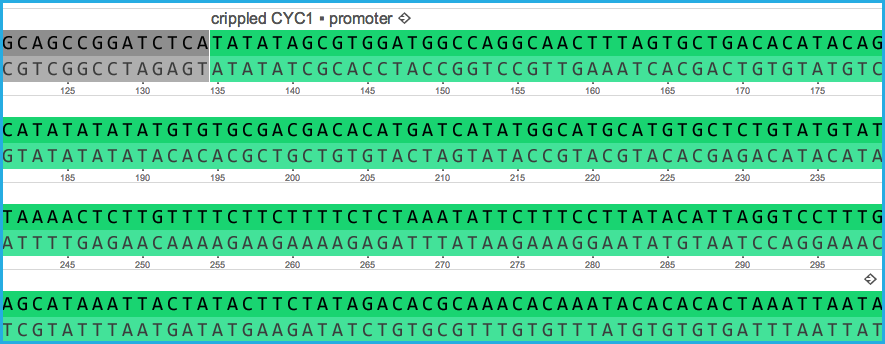 Figure 1.2.2.1: Main layer DNA set with a Promoter Feature Key and Annotation Name Crippled CYC1 with Plus Strand Directionality.
</div>
Any stretch of annotation below this main DNA sequence layer is a "sub annotation." (Figure 1.2.2.2)
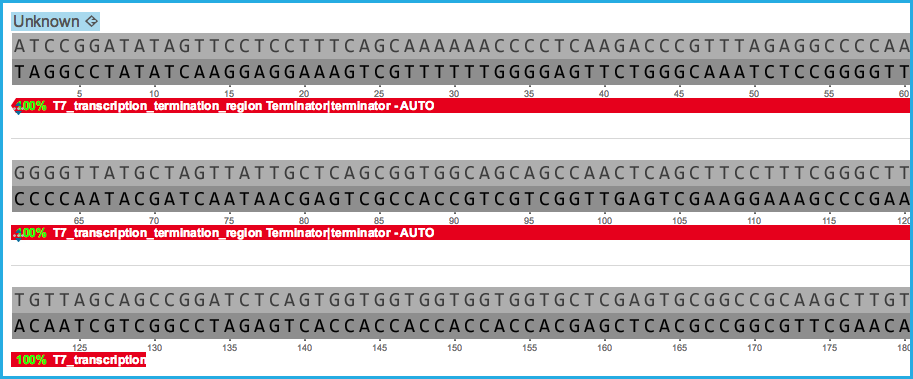 Figure 1.2.2.2: A sub-annotation below the main DNA sequence with a Terminator Feature Key and the Annotation Name T7_transcription_termination_region on the Reverse Strand.
</div>
Main DNA Layer "Parts", Features and Annotations
- Genome Compiler has a unique way to handle DNA sequences which makes it an ideal platform to simulate gene cloning, construct synthetic genes and carry out advanced workflows like combinatorial designs.
Each main layer of DNA sequence is split into unique "parts" corresponding to the Feature Key of the sequence. Each "part" has a feature key, an annotation name and strand directionality. (Figure 1.2.2.3)
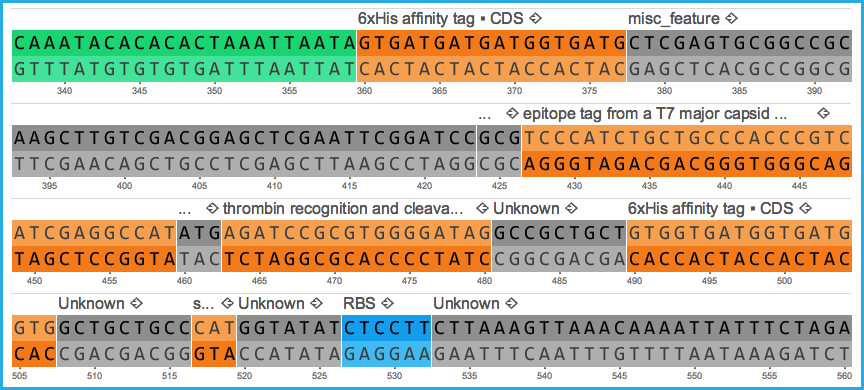 Figure 1.2.2.3: Main layer of DNA sequence split into individual parts each with an annotation name, a feature key and directionality, e.g. 6xHis affinity tag, CDS, forward strand.
</div>
- Genome Compiler's feature key list contains a long list of feature keys from NCBI (Figure 1.2.2.4) so it is easy to assign a feature to any stretch of sequence from a promoter, to a terminator, to a coding sequence (CDS).
 Figure 1.2.2.4: Feature Key List in the More Properties section.
</div>
It is then possible to add an annotation "Name" to each "Feature" in the main DNA layer and hence features and annotations are discrete entities. For example, a "part" can be created in the main DNA layer by assigning it a "Feature Key" but not have an annotation "Name." (Figure 1.2.2.5)
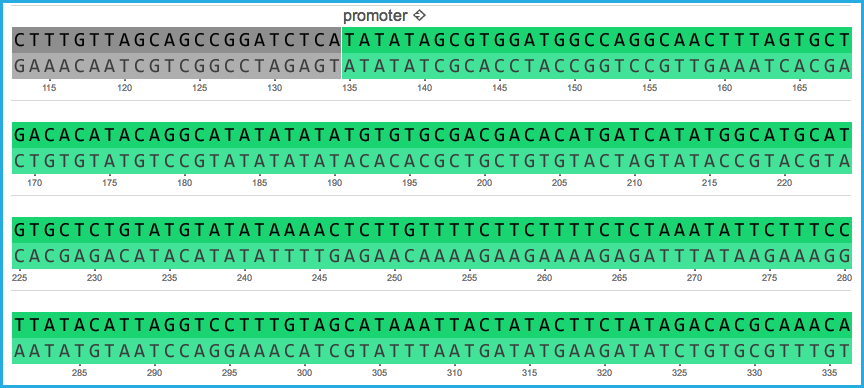 Figure 1.2.2.5: Part in the main DNA layer with a Promoter Feature key and no annotation name.
</div>
Each part in the main DNA layer contains its own editable properties and "metadata" (see section 1.2.10), for example a feature key, an annotation name, any weblinks, notes etc (Figure 1.2.2.6).
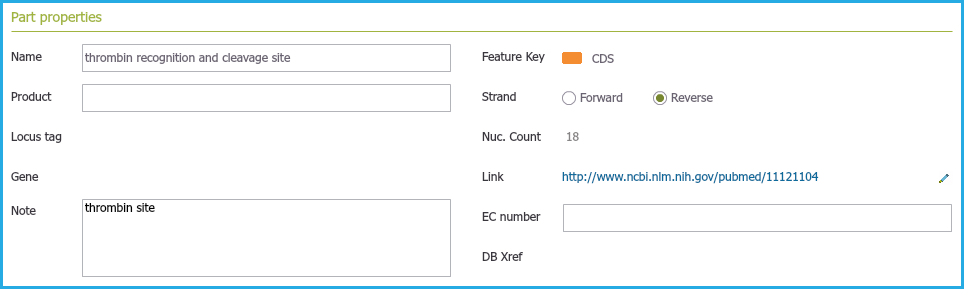 Figure 1.2.2.6: Part Properties containing associated metadata such as any notes and external links.
</div>
- Like any stretch of sequence, each part is also drag and droppable (see section 1.5.2) so it is easy to move these parts around with their associated metadata.
These "parts" also make it very convenient to move the DNA around in higher levels views such as the linear view and circular view where a more zoomed out view may be necessary to drag and move parts within or between projects or into a folder in the material box (Figure 1.2.2.7).
 Figure 1.2.2.7: Dragging and Dropping a part in the Circular View to another area within the project.
</div>
Sub-Annotations
Sub-annotations are not drag and droppable as they are not "parts" on the main DNA layer. They are merely a way to highlight and visualise stretches of DNA sequence.
Sub-annotations can easily be created by the user (see section 2.4) or by Genome Compiler's auto annotation engine (see section 1.25).
Feature Keys can also be assigned to these sub annotations and the Sub-annotation Name can be easily edited (see section 1.26).
Each sub-annotation can then individually be assigned to the main DNA layer as a main layer feature with its feature key and annotation name taken from the original sub-annotation and a new "part" will be created(Figure 1.2.2.8) (Figure 1.2.2.8.1).
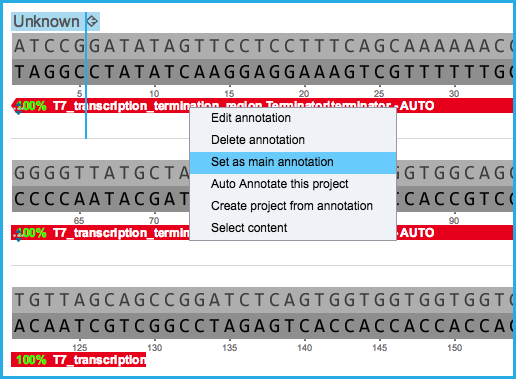 Figure 1.2.2.8: Setting a sub annotation as a main DNA layer feature to create a new part and split the main layer DNA sequence.
</div>
 Figure 1.2.2.8.1: The sub annotation has been moved to the main DNA layer to create a new part.
</div>
Project Sub-Annotation and Feature Summary Tables
Each project in Genome Compiler contains a Summary Table listing all of the projects sub annotations and all the projects main layer Features (Figure 1.2.2.9).
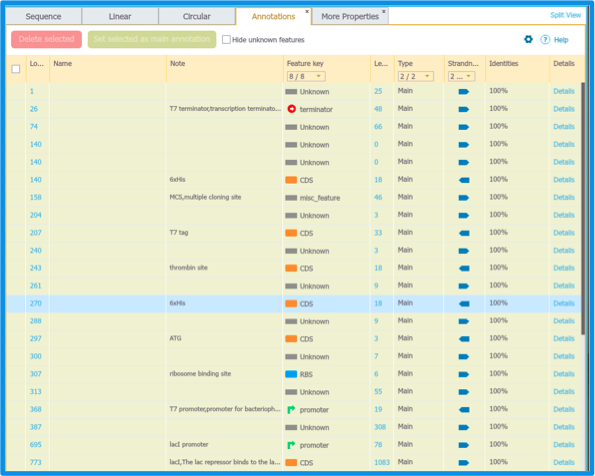 Figure 1.2.2.9: Project Summary Table including Sub annotations in white and main DNA layer Features in yellow.
</div>
The "Annotations" Summary Table can be accessed from either the menus via "View" then "Summary Tables" then "Sub annotations" (Figure 1.2.2.10) or from the "Annotation Layers" menu (Figure 1.2.2.11) (see section 1.5.2).
See section 1.26 for more details on the Annotations summary table.
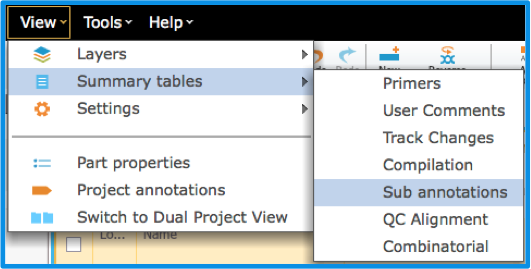 Figure 1.2.2.10: Accessing the Summary Table via the Views menu in the menu bar to view all the sub annotations including manual and auto annotations.
</div>
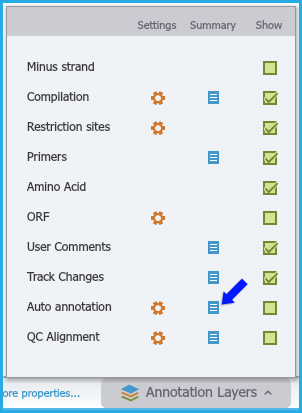 Figure 1.2.2.11: Accessing the Annotation Summary Table through Annotation Layers menu.
</div>
You can also access the "Annotations" Summary Table from the menus via "View" and then "Project Features" (Figure 1.2.2.12).
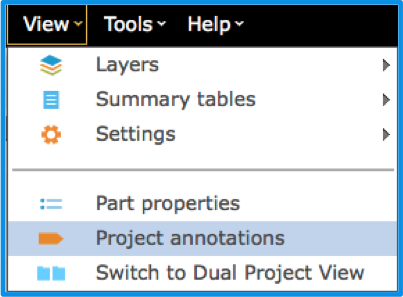 Figure 1.2.2.12: Accessing Project Annotations Summary Table via the menu bar.
</div>