2.4 Manual annotation of a sequence
Manual annotations can be created as either main annotations or sub annotations.
Creating main annotations
To annotate a sequence, go to the DNA view, select it, right click and choose "Annotate selection" from the drop down menu (Figure 2.4.1).
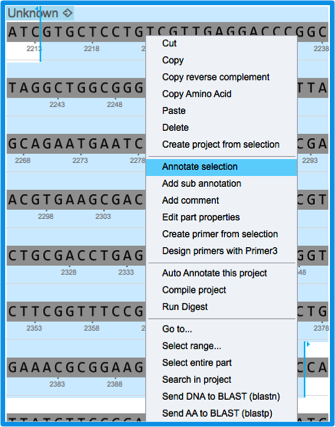 Figure 2.4.1: Creating main annotation through sequence selection.
</div>
A new tab of "More properties" will appear where all the annotation details can be inserted and modified (see section 1.2.10) (Figure 2.4.2). For instance; a name may be given as "My new seq'", the feature key can be picked to be "reporter", etc.
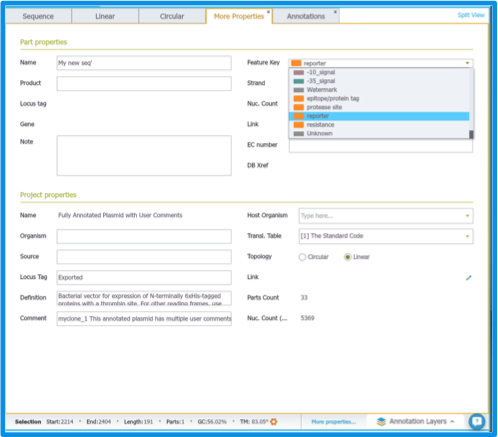 Figure 2.4.2: Filling the properties of the new annotation.
</div>
The new main annotation will be displayed as all other main annotations (Figure 2.4.3).
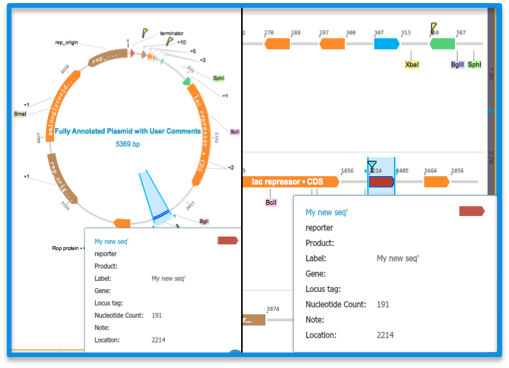 Figure 2.4.3: The new annotation display in the circular and linear views.
</div>
Creating sub annotations
Sub annotations can be created via selecting a sequence, right clicking and choosing "Add sub annotation" (Figure 2.4.4).
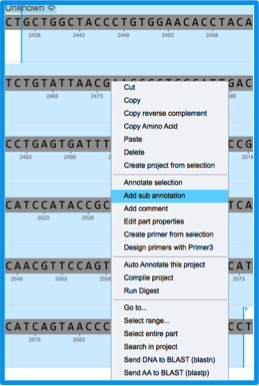 Figure 2.4.4: Creating manual sub annotation through sequence selection.
</div>
The new annotation will be displayed below the main DNA layer as well as all sequence views. Clicking on one annotation in one of the views will highlight the corresponding sequence in the adjacent view. Hovering over the annotation will show the annotation details. Right clicking will allow to edit the annotation details/ Delete the annotation/ Set the sub annotation as main/etc. (Figure 2.4.5).
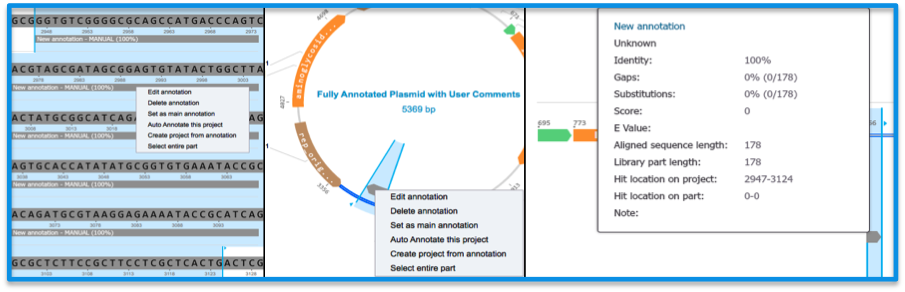 Figure 2.4.5: Sub annotation display.
</div>
The new annotation will also appear in the annotation table with the default properties: Name- "New annotation"/ Feature key- "Unknown"/ Type- "Manual"/ Strandness- "Plus"/ Identity- 100% (Figure 2.4.6). For annotation editing, see section 1.26.
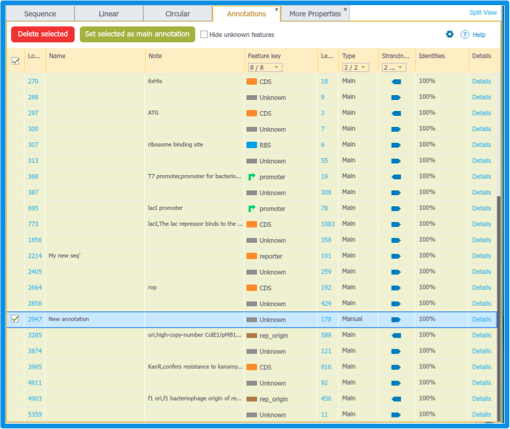 Figure 2.4.6: New manual sub annotation as displayed in the Annotation table.
</div>