1.25.3 How to Auto Annotate Sequences
To auto annotate a whole project, either:
Right click anywhere on the project canvas and select "Auto annotate this Project" from the right click drop down menu (Figure 1.25.3.1).
 Figure 1.25.3.1: Initiate auto annotate from project menu.
</div>
Or select the "Auto annotate" button on the tool bar (Figure 1.25.3.2). The "Auto annotation Settings" dialog will open whereby you can select which folders to annotate against and the stringency (see next section 1.25.4 for more details).
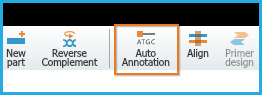 Figure 1.25.3.2: Initiating auto annotate from Auto Annotation icon in tool bar.
</div>
Or select the "Auto Annotation" settings icon from the Annotation layers menu at the bottom right of the project (Figure 1.25.3.3).
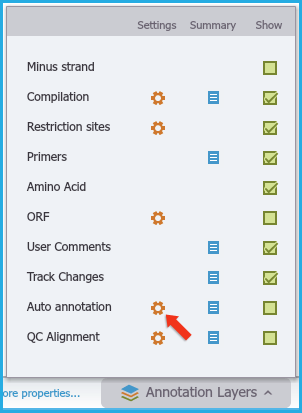 Figure 1.25.3.3: Initiating auto annotate from Annotation Layers menu.
</div>
Or from the menu bar select "Tools" and "Auto annotate" (Figure 1.25.3.4).
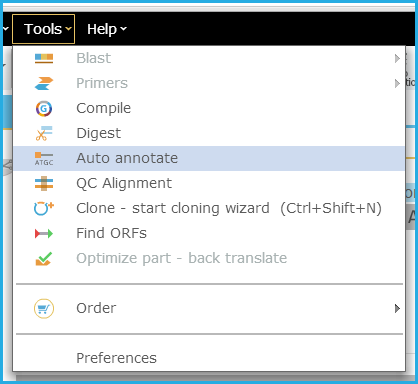 Figure 1.25.3.4: Initiating auto annotate from menu bar.
</div>
If a project is opened without any annotations, for example an imported .txt file or a fasta file, then a pop up dialog will automatically appear and ask if you would like to annotate your project (Figure 1.25.3.5).
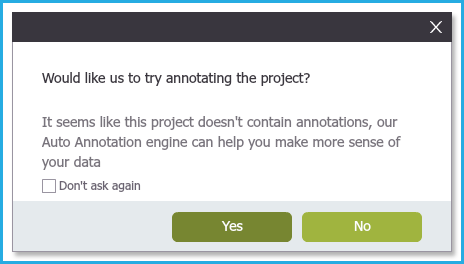 Figure 1.25.3.5: Pop up for project with no annotations.
</div>
If you select "Yes" then you will be taken to the "Auto Annotation Settings" dialog to choose your folders to annotate against and select the stringency before proceeding to annotate the project. Note: Each time you re-run the auto annotate function, the whole project is re-annotated again, so this may result in duplicated annotations. Each time you save the project, all the annotations are saved.