Primer Design
Details about this feature can be found in the main Genome Compiler user guide:
-See section 1.18 for Primer Design.
In order to design primers in SnapGene you should first select a sequence from the sequence map, go to “Primers” from the main menu and choose “Add Primer” (Figure 3.4.8.1). The Add primer dialogue will allow you to edit the primer (Figure 3.4.8.2).
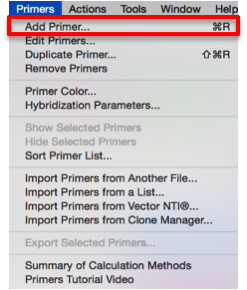 Figure 3.4.8.1: Launching “Add Primer” dialog from the main menu in SnapGene.
</div>
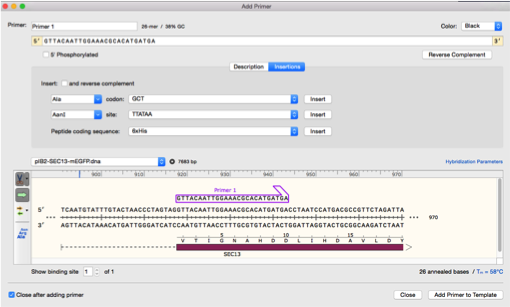 Figure 3.4.8.2: “Add Primer” dialog in SnapGene.
</div>
For designing primers in Genome Compiler you can access the Primer Design dialogue after you select a fragment. This can be done in two ways: select a fragment in one of the projects views (Linear/Circular/Sequence) and either right click to open the drop down menu (Figure 3.4.8.3) or click the “Primer Design” button in the toolbar (Figure 3.4.8.4). In both cases you can choose to create a primer from your selection or to auto design primers with Primer3. The first will open the Manual Primer Design dialog (Figure 3.4.8.5) whereas the latter will open the Auto Design Primers dialog (Figure 3.4.8.6). For more information on primer design see section 1.18.
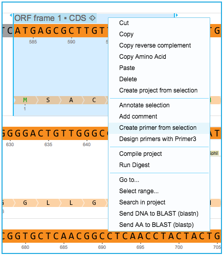 Figure 3.4.8.3: Opening Primer Design dialog in Genome Compiler through right click.
</div>
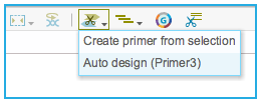 Figure 3.4.8.4: Opening Primer Design dialog in Genome Compiler through “Primer Design” button in the main toolbar.
</div>
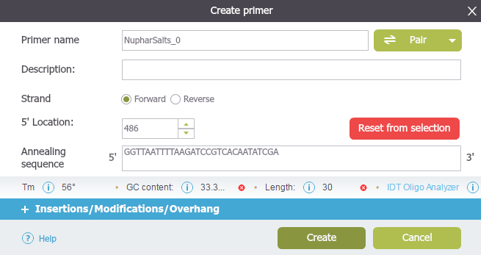 Figure 3.4.8.5: Create a primer from your selection will open the Manual Primer Design dialog.
</div>
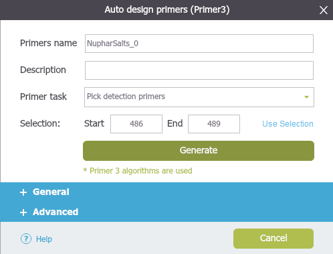 Figure 3.4.8.6: Auto design primers with Primer3 will open the Auto Design Primers dialog.
</div>