3.2.1.2 Transferring Protein molecule files from vector NTI to Genome compiler
Details about this feature can be found in the main Genome Compiler user guide:
See section 1.4 for Importing/Exporting files.
First step- Export from vector NTI as .FASTA file.
In vector NTI open the requested protein molecule and either click "File"-"Save As“ (Figure 3.2.1.2.1) or "Edit"-"Molecule Operations"-"Export" (Figure 3.2.1.2.2). In the Export/Save as Data window go to “Save As File” and choose Protein Fasta Files (*.txt) (Figure 3.2.1.2.3).
Alternatively, if you wish to export molecules directly from the local vector NTI database you can select a single molecule (but not several), and either right click and choose “Export”-”… into Text File” (Figure 3.2.1.2.4) or go to "Protein" from the main menu and choose “Export”-”… into Text File” (Figure 3.2.1.2.5). In the new window choose to save the file as FASTA (.txt).
Please don't attempt to save several protein files as Archive files (.pa4) since we don't support .pa4 files yet so you won't be able to import them into Genome Compiler. The best solution is to export them as single FASTA files as shown above.
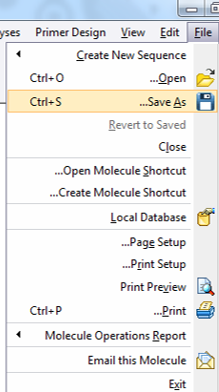 Figure 3.2.1.2.1: Export an open molecule from vector NTI through "File" in the main menu.
</div>
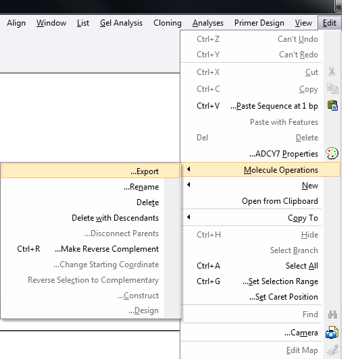 Figure 3.2.1.2.2: Export an open molecule from vector NTI through "Edit" in the main menu.
</div>
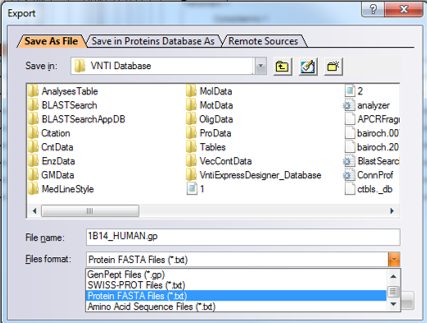 Figure 3.2.1.2.3: Export an open protein molecule from vector NTI as a .FASTA file.
</div>
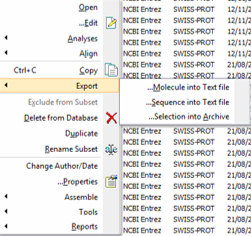 Figure 3.2.1.2.4: Export a protein molecule from the local vector NTI database using right click.
</div>
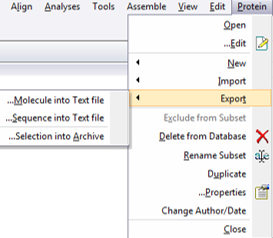 Figure 3.2.1.2.5: Export a protein molecule from the local vector NTI database using the main menu.
</div>
Second step- Import to Genome Compiler.
To import a file you can either click the “Import File” icon in the main toolbar (Figure 3.2.1.2.6) or in the Materials box (Figure 3.2.1.2.7) or through choosing “File”-“Import” (Figure 3.2.1.2.8). A dialog will pop up to allow you to choose the file from your computer files (Figure 3.2.1.2.9). Once you've selected a file, another dialog will pop up (Figure 3.2.1.2.10) to prompt you for a location. You can choose to save the file in an existing folder or to create a new folder.
For more information on importing files see section 1.4.
 Figure 3.2.1.2.6: Import File to Genome Compiler from the icon in the main toolbar
</div>
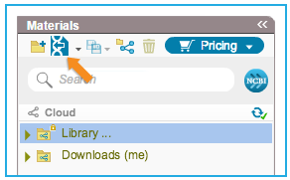 Figure 3.2.1.2.7: Import File to Genome Compiler from the icon in the Materials box
</div>
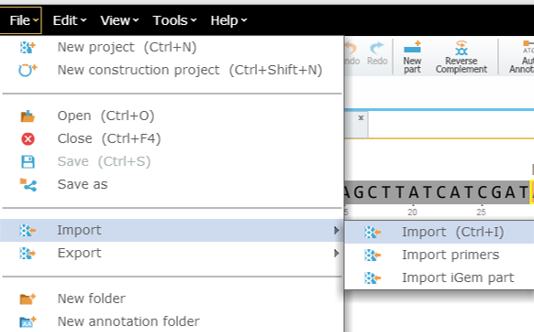 Figure 3.2.1.2.8: Import File to Genome Compiler through choosing “File”-“Import”
</div>
 Figure 3.2.1.2.9: Choose the requested file from your computer
</div>
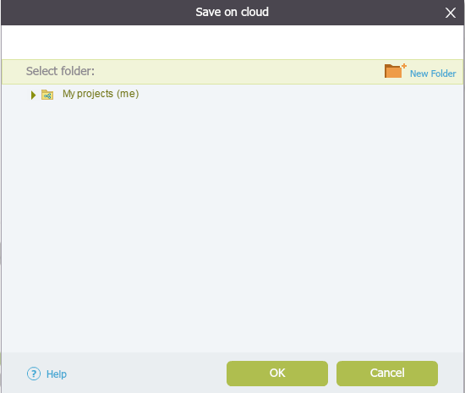 Figure 3.2.1.2.10: Choose the location for the imported file
</div>
For more information on Exporting files from Genome Compiler see section 1.4.