Detect common features a.k.a Auto annotations
Details about this feature can be found in the main Genome Compiler user guide:
-See section 1.23 for Auto annotations.
In SnapGene you can open a molecule and go to “Features” – ”Detect common features” from the main menu (Figure 3.4.6.1) to search for annotations from the common features library. It will also automatically check for common features in order to annotate your sequence upon importing a new sequence.
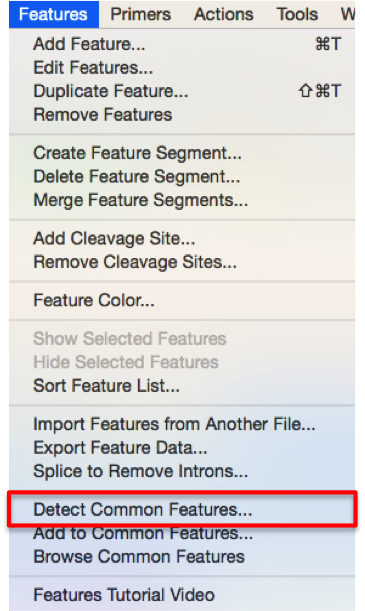 Figure 3.4.6.1: Initiate "Annotate Features Using Library" from the main menu in ApE.
</div>
In Genome Compiler in order to auto-annotate a whole project, you should open the "Auto-annotation Settings" dialog (Figure 3.4.6.2) whereby you can select which folders to annotate against and the stringency (See section 1.23.4). Genome Compiler provides an internal Plasmapper library as well as allow you to create your own custom libraries. This dialog can be opened by right clicking anywhere on the project canvas and choosing "Auto-annotate this Project" (Figure 3.4.6.3) or by selecting the "Auto-annotate" button in the main tool bar (Figure 3.4.6.4). Alternatively, you can press the "Auto Annotation" settings icon from the Annotation layers menu at the bottom right of the project (Figure 3.4.6.5) or from the main menu bar through "Tools"-"Auto-annotate" (Figure 3.4.6.6).
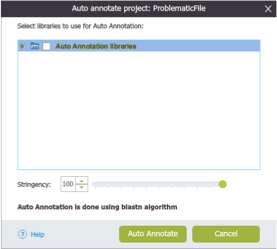 Figure 3.4.6.2: "Auto-annotation Settings" dialog in Genome Compiler.
</div>
 Figure 3.4.6.3: Initiate auto-annotate from project menu.
</div>
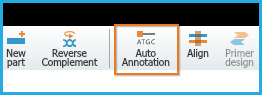 Figure 3.4.6.4: Initiating auto-annotate from Auto-Annotation icon in tool bar.
</div>
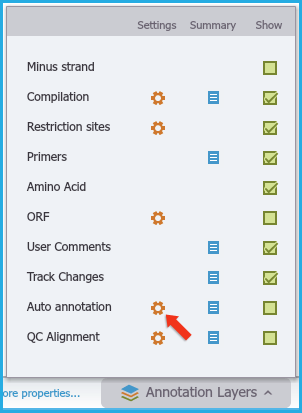 Figure 3.4.6.5: Initiating auto-annotate from Annotation Layers menu.
</div>
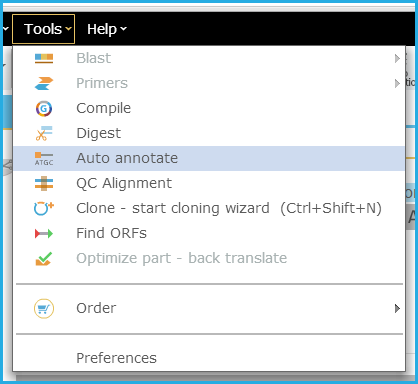 Figure 3.4.6.6: Initiating auto-annotate from menu bar.
</div>
If a project is opened without any annotations, for example an imported .txt file or a fasta file, then a pop up dialog will automatically appear and ask if you would like to annotate your project. (Figure 3.4.6.7)
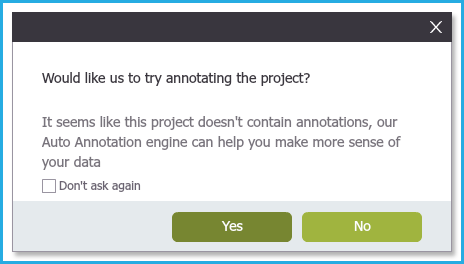 Figure 3.4.6.7: Pop up for project with no annotations.
</div>
If you select "Yes" then you will be taken to the "Auto-Annotation Settings" dialog to choose your folders to annotate against and select the stringency before proceeding to annotate the project. Note: Each time you re-run the auto-annotate function, the whole project is re-annotated again, so this may result in duplicated annotations. Each time you save the project, all the annotations are saved.