2.3 Cloning
This simple flow describes the process of subcloning and genomic DNA cloning. Find more information about the Cloning Wizard in section 1.21.
Step 1: Cloning Procedure
Open the cloning Wizard by clicking the icon in the toolbar (Figure 2.3.1).
 Figure 2.3.1: The “Cloning Wizard” icon in the toolbar.
</div>
Type in a ”Project name” and select ”Restriction Ligation” as ”Cloning procedure” (Figure 2.3.2).
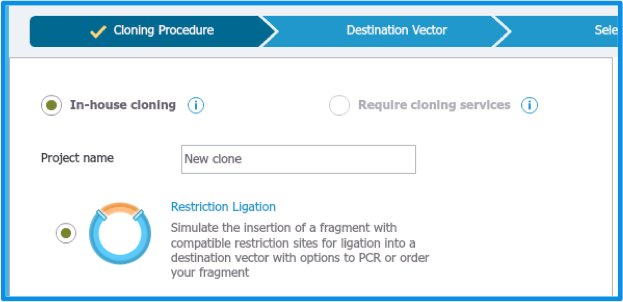 Figure 2.3.2: The ”Cloning Procedure” tab.
</div>
Step 2: Destination Vector
Your recipient plasmid needs to be in the Materials box. If it is not already in our library, you can import it (more on our import feature in section 1.4), or find it in the NCBI database (more on NCBI search in section 1.9). Once your plasmid is in the Materials box, find it using the search in the Materials box (see section 1.7). Drag and drop the recipient plasmid as destination vector (Figure 2.3.3). If you change your mind you can drag and drop another plasmid in the box, and the plasmid will be replaced.
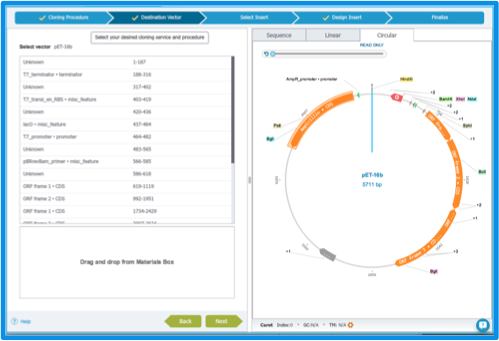 Figure 2.3.3: The ”Destination Vector” tab.
</div>
Step 3: Select Insert
Find your insert. If your insert is in a donor plasmid in the Materials box, load the plasmid by clicking on its name. You can then expand the single parts by clicking the arrow on the left of the plasmid's name (Figure 2.3.4). Drag and drop the insert in the box. If your donor plasmid is not yet in the Materials box, import it (more on our import feature in section 1.4) or find it in the NCBI database (more on NCBI search in section 1.9).
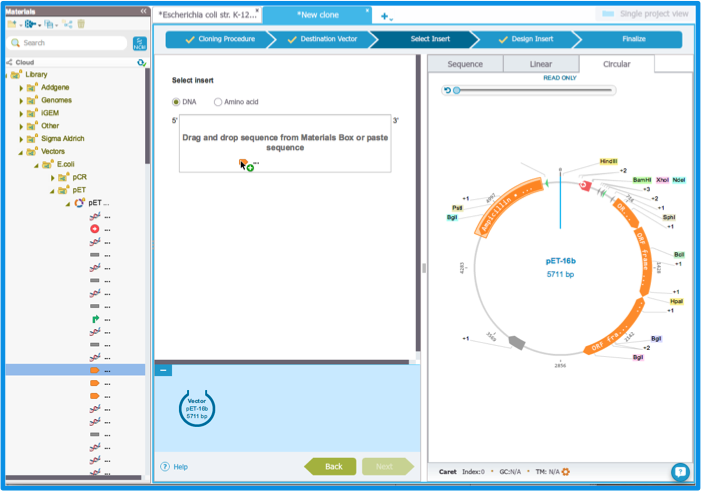 Figure 2.3.4: The ”Select Insert” tab: dragging and dropping the insert.
</div>
When your insert is genomic DNA, open the genome in another tab. Find your insert using the search box at the top right and copy and paste the sequence in the box (Figure 2.3.5). If the genome is not yet in the Materials box, import it (more on our import feature in section 1.4) or find it in the NCBI database (more on NCBI search in section 1.9).
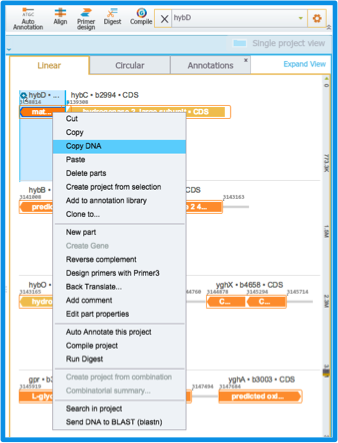 Figure 2.3.5: Searching for your insert using the search box, and copying its DNA sequence from the right click drop down menu.
</div>
You can also copy and paste your insert sequence from an external source.
Select restriction sites (Figure 2.3.6). They determine the sequence in the plasmid that will be cut out and replaced by the insert. If you cannot find the restriction sites you would like to use, click "Configure" to edit the list. More details about this step can be found in section 1.21.4.
 Figure 2.3.6: The ”Select Insert” tab: selecting restriction sites.
</div>
Step 4: Design Insert
When doing subcloning or cloning genomic DNA, you PCR the insert. Select this option by checking the checkbox. The source plasmid can be dragged and dropped so that it appears in the cloning summary. Design the PCR primers which will allow you to extract the insert from the source plasmid or the genome. When designing your primers, the melting temperature should be 52-58°C, the GC content should be 40-60% and the length 18-22 bp. Check secondary structures with the "IDT Oligo Analyzer" link, and keep the Tm difference as low as possible. (Figure 2.3.7). More details about this step can be found in section 1.21.6.
 Figure 2.3.7: The ”Design Insert” tab: PCR insert.
</div>
Step 5: Finalize
You have reached the final step of the Cloning Wizard! The cloning process is summarized in the "Finalize" tab (Figure 2.3.8). You can export the product to save it with your other projects, and export the summary as text. You can then easily find your primers when you want to order them.
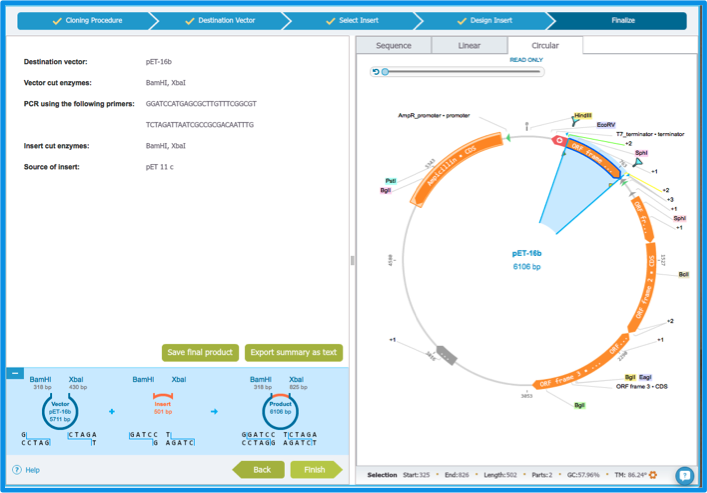 Figure 2.3.8: The ”Finalize” tab.
</div>