Adding new parts
Details about this feature can be found in the main Genome Compiler user guide:
-See section 1.4 for standard editing tools.
To add a new part in SnapGene first place a cursor at the insertion point or select the sequence to be replaced, go to “Edit” in the main menu and select “Insert Bases” (Figure 3.4.13.1). Paste or type a sequence into the dialogue and press “Insert” (Figure 3.4.13.2). The new inserted sequence will be highlighted allowing you to define it as a specific feature (Figure 3.4.13.3) by choosing “Add feature” from “Features” in the main menu (Figure 3.4.13.4).
 Figure 3.4.13.1: Inserting a sequence in SnapGene.
</div>
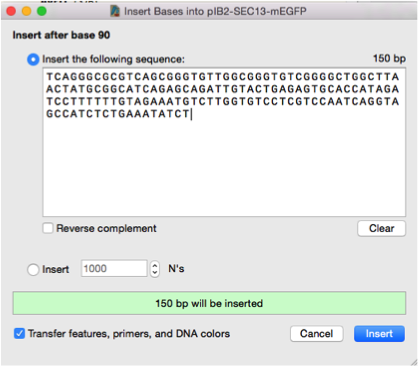 Figure 3.4.13.2: "Insert Bases" dialog in SnapGene.
</div>
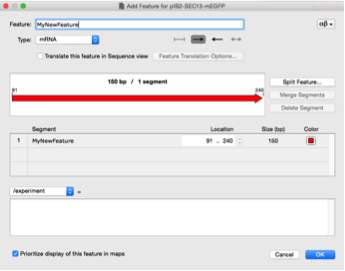 Figure 3.4.13.3: "Add feature" dialog in SnapGene.
</div>
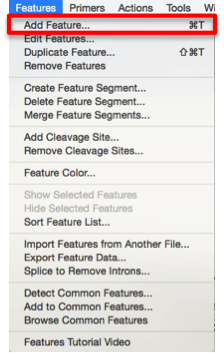 Figure 3.4.13.4: Adding a feature in SnapGene.
</div>
To add a new part in Genome Compiler you should first add a new part to your project and then type or paste DNA into this new part.
In order to add a new part right click where you would like your new part to be and select “New part” from the drop down menu (Figure 3.4.13.5), or click the “Create New Part” icon in the main toolbar (Figure 3.4.13.6), or click "New Part" from "Edit" in the menu bar (Figure 3.4.13.7).
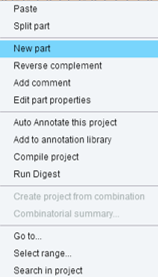 Figure 3.4.13.5: Adding a new part in Genome Compiler by right click.
</div>
 Figure 3.4.13.6: Adding a new part in Genome Compiler trough the ”New part” icon in the toolbar.
</div>
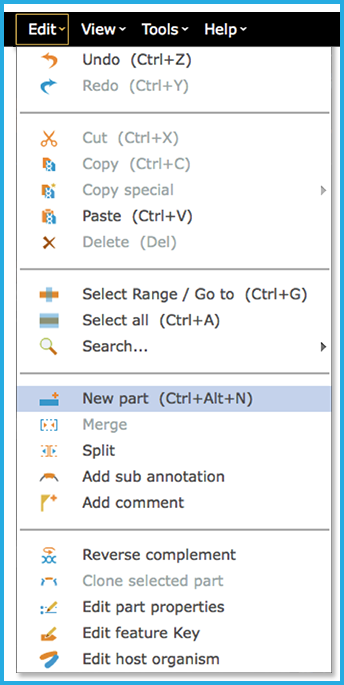 Figure 3.4.13.7: Adding a new part in Genome Compiler via Edit in the menu bar.
</div>
This will create an empty part (Figure 3.4.13.8) which can be edited in the DNA view (Figure 3.4.13.9). Empty parts are not shown in the circular view.
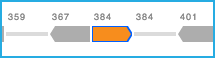 Figure 3.4.13.8: New empty part in the linear view.
</div>
 Figure 3.4.13.9: New empty part in the DNA view.
</div>