1.25.5 Viewing and Editing Annotations
The auto annotation results will be added to the Annotations summary table which will open automatically upon the completion of the auto annotation (Figure 1.25.5.1). This table contains a list of all the annotations detected in the project alongside the main and manually added annotations. For more information on the features table and its functions refer to section 1.26.
 Figure 1.25.5.1: Annotations table.
</div>
The annotation results for auto annotated projects appear in layers below the main DNA sequence in all the project views; the Sequence view (Figure 1.25.5.2), the Circular view (Figure 1.25.5.3), and the Linear View (Figure 1.25.5.4).
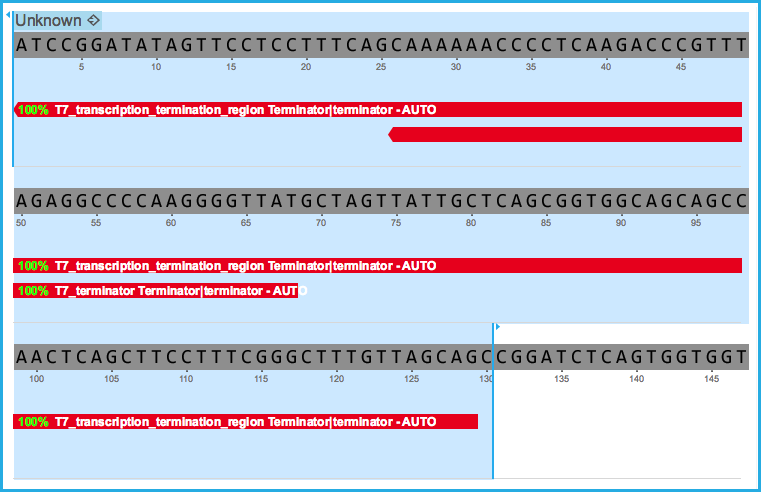 Figure 1.25.5.2: Auto annotations in Sequence View.
</div>
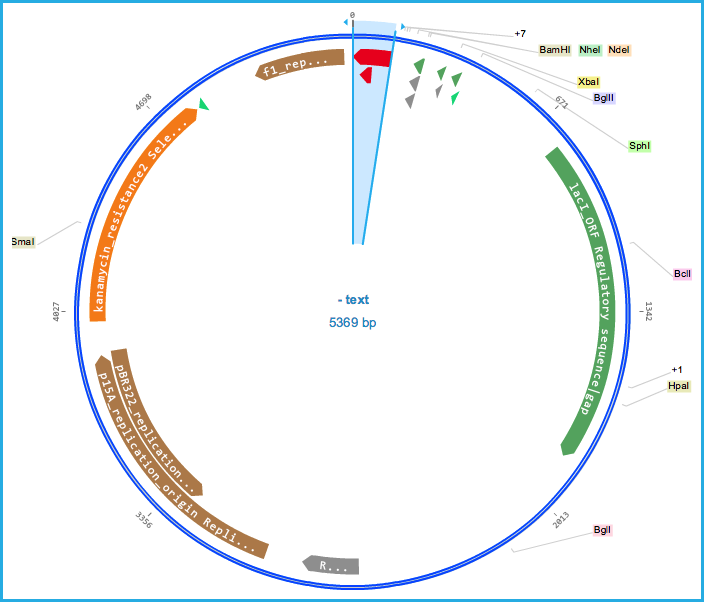 Figure 1.25.5.3: Auto annotation in Circular View.
</div>
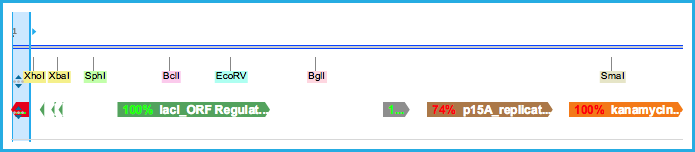 Figure 1.25.5.4: Auto annotations in Linear View.
</div>
Annotations have the indication of the match percentage and the name of the part.
Clicking on each annotation highlights the corresponding sequence in the DNA (Figure 1.25.5.2).
How to Edit Auto annotations
In order to edit the auto annotation you can either right click on the annotation in the project and select "Edit annotation" (Figure 1.25.5.5) which will take you to the entry in the features summary table or directly from the features summary table. For how to edit the annotation see section 1.26.
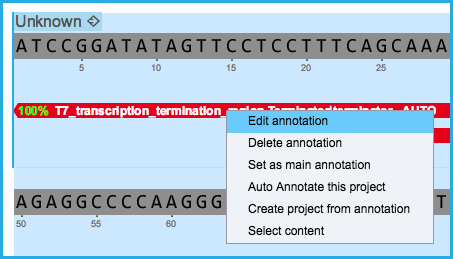 Figure 1.25.5.5: Edit annotation from Sequence View.
</div>
Deleting Auto annotated Sequences via the Project
To delete a single annotation, right click on the annotation in the project and select "Delete Annotation" (Figure 1.25.5.6). Alternatively, it can be deleted via the features summary table ( 1.26).
This will remove the annotation from the project, but not from the library.
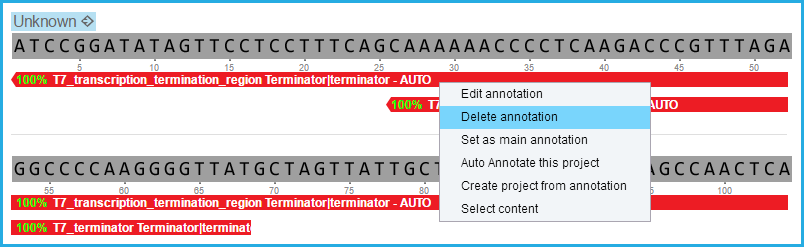 Figure 1.25.5.6: Delete annotation.
</div>
Setting Annotations to Main Layer
It is important to note that auto-annotations are not real features in the project; they are like an ORF annotation whereby they appear below the main DNA sequence and do not split it into an individual part to create a new feature.
In order to create a new feature out of this annotation and add it to the main layer, right click on the annotation in the project and select "Set as main annotation" from the drop down menu (Figure 1.25.5.7). This can be done through the features summary table as well ( 1.26).
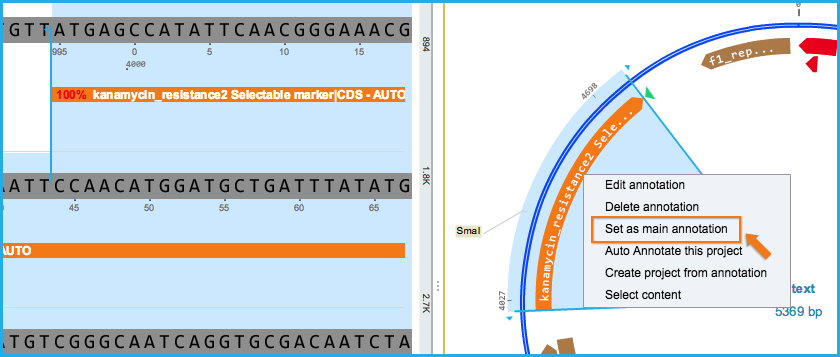 Figure 1.25.5.7: Set annotation to Main Layer.
</div>
This action does not change the main DNA sequence in the project; it just creates a new part by splitting the DNA sequence and adds the same annotation name and feature key (Figure 1.25.5.8).
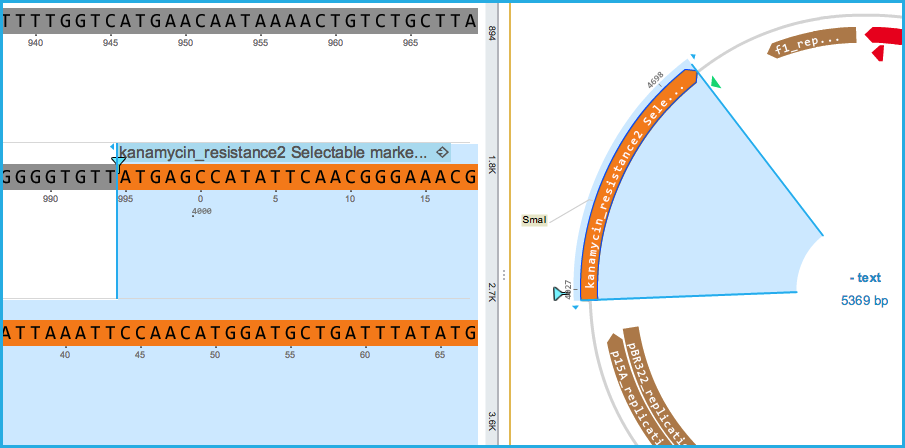 Figure 1.25.5.8: Set annotation as Main.
</div>
- If the annotation taken from the library was not a 100% match to the sequence in the project, then the newly created part will have in the Name "X% similar to [annotation_name]." This will enable you to recall that this is just a putative annotation as it didn't score a 100% match.
How to hide Auto annotation Layer
To hide auto annotations from view, un check the “Auto annotation” tick box in the Annotation Layers menu at the bottom right of the project. Re-select this check box at any time to view again (Figure 1.25.5.9).
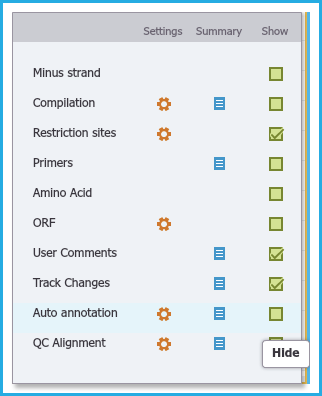 Figure 1.25.5.9: Hide Auto Annotation Layer.
</div>