3.1.1.3 Transferring single/multiple Oligos from vector NTI to Genome compiler
Details about this feature can be found in the main Genome Compiler user guide:
See section 1.4 for Importing/Exporting files.
See section 1.19.7 for Primer Summary Table information.
First step- Export from vector NTI as csv file.
In vector NTI open the Records Viewer- Oligos and Export by selecting several or single objects, then click File-Export (Figure 3.1.1.3.1) or Right click and then select Export (Figure 3.1.1.3.2). In the Export Data window choose .CSV (*.csv) or .Oa4 (Figure 3.1.1.3.3).
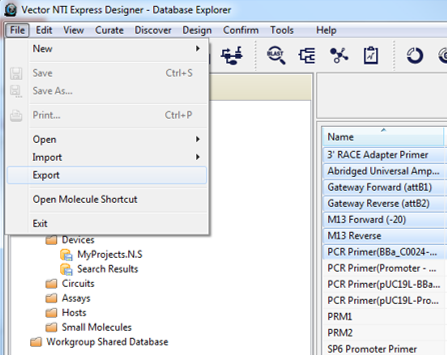 Figure 3.1.1.3.1: Export oligos from vector NTI through File-Export.
</div>
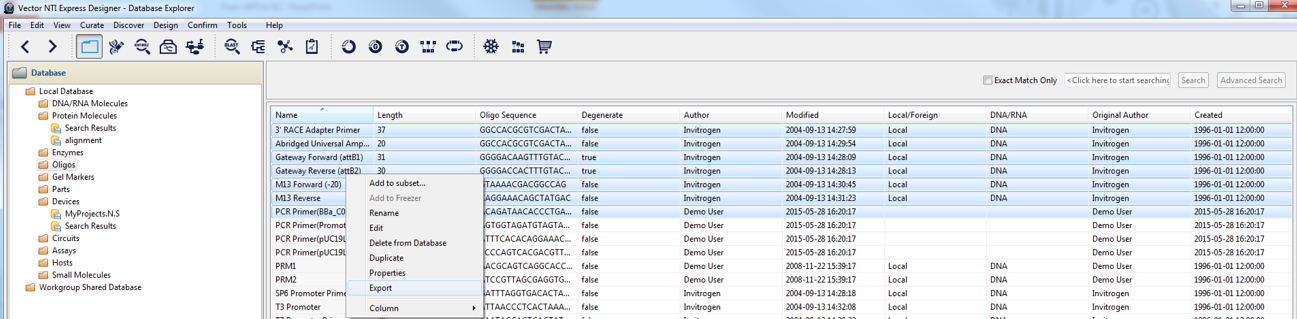 Figure 3.1.1.3.2: Export oligos from vector NTI by right click-Export.
</div>
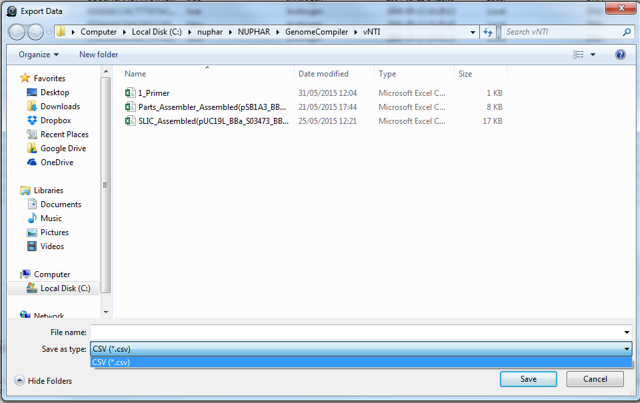 Figure 3.1.1.3.3: Choose .CSV (*.csv)file in the Export Data window.
</div>
Second step - Arrange the file.
After exporting the file, you should open it in Excel and rearrange it in the right order to fit the Primer/Oligos table in Genome Compiler (Figure 3.1.1.3.4). Columns order: NAME/SEQUENCE/STRAND/LEADER (e.g Primer1,TGACGATGCCGATTTGGAAA,PLUS,GCGCG) Comma separated: NAME,SEQUENCE,STRAND,LEADER (e.g Primer1,TGACGATGCCGATTTGGAAA,MINUS,GCGCG) Tab separated: NAME SEQUENCE STRAND LEADER (e.g Primer1 TGACGATGCCGATTTGGAAA PLUS GCGCG).
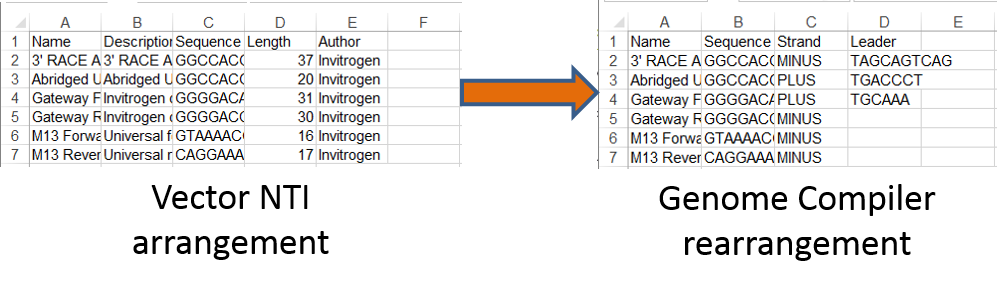 Figure 3.1.1.3.4: Rearrange the file from vector NTI to fit Genome Compiler.
</div>
Third step- Import to Genome Compiler.
Starting with your target project open, navigate to the menu bar and select “File,” then “Import,” and then “Import Primers” (Figure 3.1.1.3.5). The “Import Primer” dialog box will then open where you can upload your primer library (Figure 3.1.1.3.6). First check that your file is in line with the file format described in the top of the dialog, if it’s in the right order click “choose a file” to choose the appropriate file. The primers will then be imported into the Import Primers dialog where you can select the check boxes of the primers you would like to detect in the project and then “Import”. The primers which are complementary to your sequence will appear on the sequence (Figure 3.1.1.3.7) as well as in the Primer Summary Table for that specific project (Figure 3.1.1.3.8) (see section 1.19.7 for Primer Summary Table information).
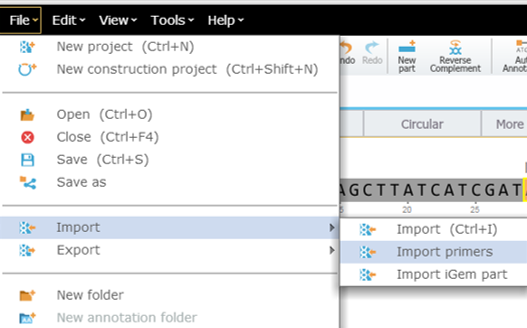 Figure 3.1.1.3.5: Opening "Import Primers" dialog box in Genome Compiler.
</div>
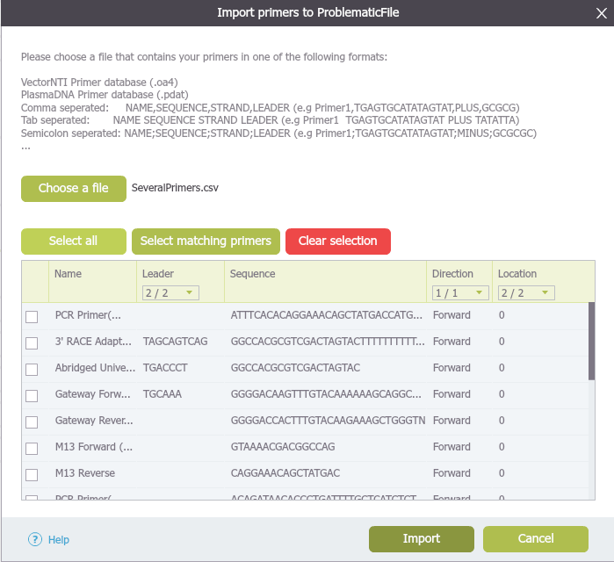 Figure 3.1.1.3.6: Upload your primer library through the "Import Primers" dialog box.
</div>
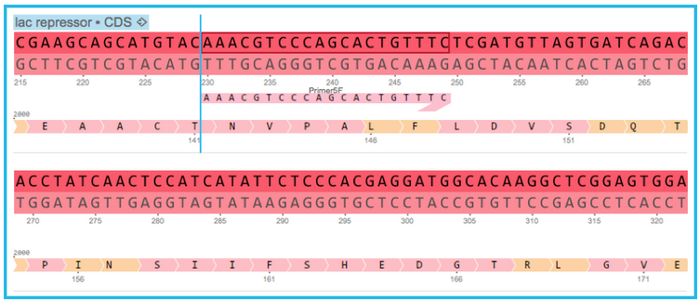 Figure 3.1.1.3.7: Complementary primers will appear in the sequence view.
</div>
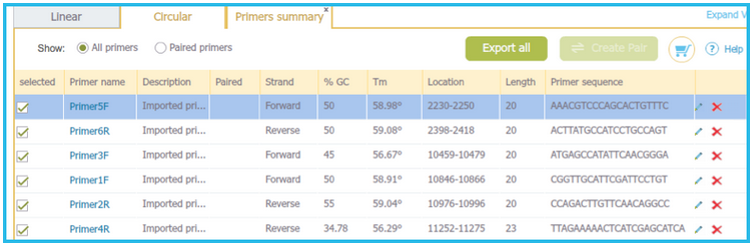 Figure 3.1.1.3.8: Complementary primers will appear in the project Primer Summary Table.
</div>
Note: If the primers you imported are not complementary to anywhere on the sequence then they will not be added to your project or saved anywhere inside the program. For more information on importing/exporting files please refer to section 1.4.