3.3.1.2 Transferring Protein molecule files from ApE to Genome compiler
Details about this feature can be found in the main Genome Compiler user guide:
See section 1.4 for Importing/Exporting files.
ApE is a DNA software, it created a protein file when aiming to translate a DNA file. If you attempt to save this protein sequence by right click- “Save as”, it will be saved in a format which Genome Compiler cannot yet read. The best way to solve this issue would be to first upload your DNA sequence and then translating it as described in this section.
First step- Import to Genome Compiler.
To import a file you can either click the “Import File” icon in the main toolbar (Figure 3.3.1.2.1) or in the Materials box (Figure 3.3.1.2.2) or through choosing “File”-“Import” (Figure 3.3.1.2.3). A dialog will pop up to allow you to choose the file from your computer files (Figure 3.3.1.2.4). Once you've selected a file, another dialog will pop up (Figure 3.3.1.2.5) to prompt you for a location. You can choose to save the file in an existing folder or to create a new folder.
For more information on importing files see section 1.4.
 Figure 3.3.1.2.1: Import File to Genome Compiler from the icon in the main toolbar.
</div>
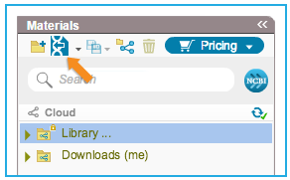 Figure 3.3.1.2.2: Import File to Genome Compiler from the icon in the Materials box.
</div>
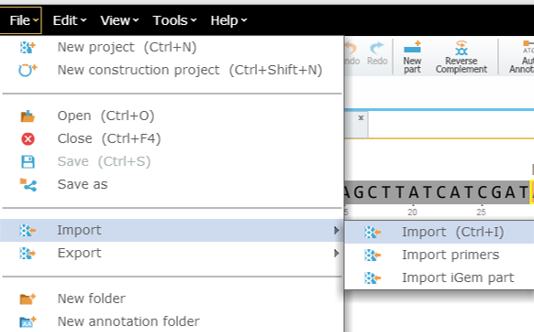 Figure 3.3.1.2.3: Import File to Genome Compiler through choosing “File”-“Import”.
</div>
 Figure 3.3.1.2.4: Choose the requested file from your computer.
</div>
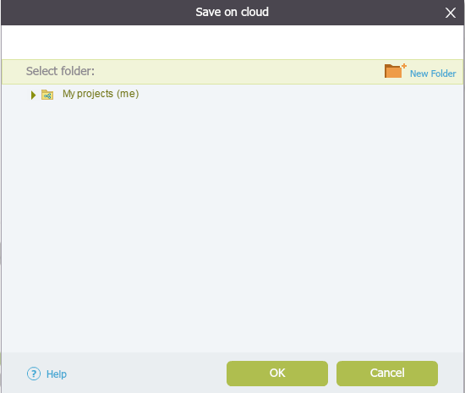 Figure 3.3.1.2.5: Choose the location for the imported file.
</div>
For more information on Exporting files from Genome Compiler see section 1.4.
Second step – Translate your DNA sequence.
Choose the whole sequence or a fragment and set as CDS by first selecting the sequence in one of the Sequence/Circular/Linear views. Then you can right click and either choose “Annotate selection” (Figure 3.3.1.2.6) or “Edit part properties” (Figure 3.3.1.2.7) or directly go to the “More Properties” tab (Figure 3.3.1.2.8). In this tab open the drop down “Feature Key” window and choose CDS (or all other orange feature keys) (Figure 3.3.1.2.8). This will automatically translate your sequence and display it underneath the DNA sequence (Figure 3.3.1.2.9).
 Figure 3.3.1.2.6: Setting selection as CDS through right click-“Annotate selection”.
</div>
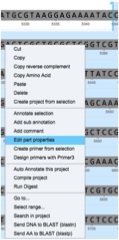 Figure 3.3.1.2.7: Setting selection as CDS through right click-“Edit part properties”.
</div>
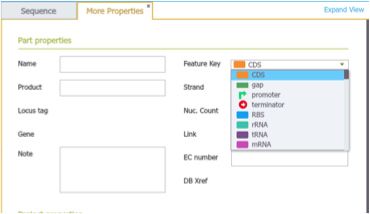 Figure 3.3.1.2.8: “More Properties” tab.
</div>
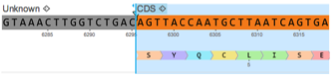 Figure 3.3.1.2.9: Protein sequence display underneath the DNA sequence.
</div>