2.1 Auto annotation
This flow describes how to add your own auto annotation folders and how to auto annotate sequences. Find detailed information about this feature in section 1.25.
Step 1 - Create custom auto annotation folder
Right click in the material box and select "New Annotation folder." (Figure 2.1.1).
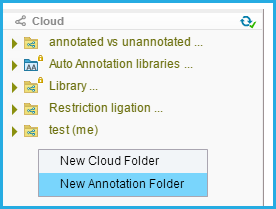 Figure 2.1.1: Creating custom auto annotation folders via Material Box.
</div>
Step 2 - Add or import parts to the auto annotation folder
From an opened project select the appropriate part, right click and select "Add to annotation library" (Figure 2.1.2). You will then be prompted to select which custom folder to save the part to.
 Figure 2.1.2: Add parts to auto annotation library from project.
</div>
Or batch import parts into your custom auto annotation library. Select the small dropdown arrow next to the "Import" icon in the Materials box and select "Parts" (Figure 2.1.3). A dialog will then pop up where you can add parts by clicking the yellow "add part" icon at the top left of the dialog. A new entry is created where you can name the part, select the feature key and then copy paste the sequence (Figure 2.1.4). You can do this for as many parts as you like. Select import and then choose the folder where you wish to save these parts.
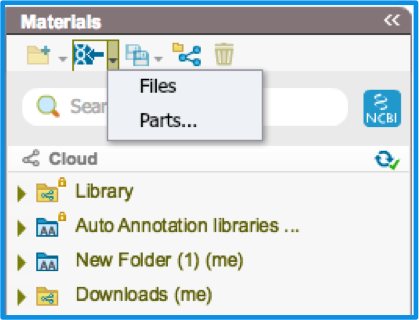 Figure 2.1.3: Importing parts via Material Box.
</div>
 Figure 2.1.4: Dialog for importing parts.
</div>
Step 3 - Auto annotating sequences
Open an annotated or un-annotated project in Genome Compiler.
If the project does not contain any annotations then upon opening the project a pop up will open, asking you if you would like to auto annotate your project . (Figure 2.1.5)
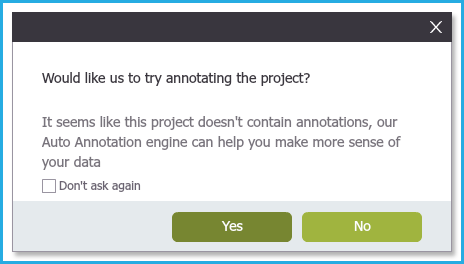 Figure 2.1.5: Creating custom auto annotation folders via Material Box.
</div>
In an opened project, you can trigger auto annotation by selecting the "Auto annotation" icon from the tool bar (Figure 2.1.6).
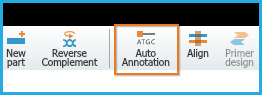 Figure 2.1.6: Auto annotation icon in tool bar.
</div>
The above two actions will prompt the Auto annotations Setting dialog to open (Figure 2.1.7). Select the folders you would like to auto annotate against.
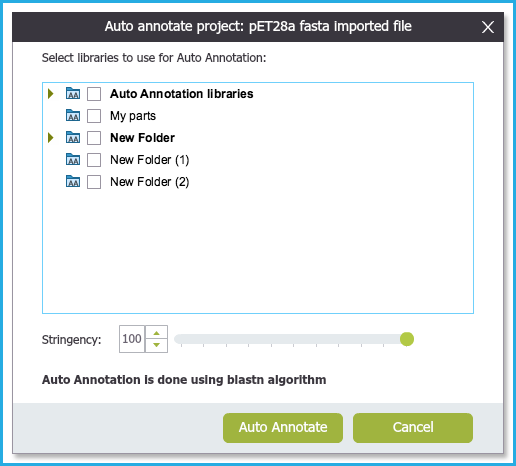 Figure 2.1.7: Auto annotation Settings Dialog.
</div>
You can see the Genome Compiler locked library and your own custom library which you created.
Alter the stringency if you would like to detect sequences with less than 100% similarity.
Step 4 - Viewing auto annotations
The annotations will appear below the main DNA layer all sequence views and clicking on one annotation in one of the views will highlight the corresponding sequence in the adjacent view. (Figure 2.1.8)
 Figure 2.1.8: Simultaneous viewing of auto annotations in Sequence and Circular View .
</div>
You can view a summary of auto annotations in the "Auto Annotations Summary Table" which will automatically appear as a new tab (Figure 2.1.9).
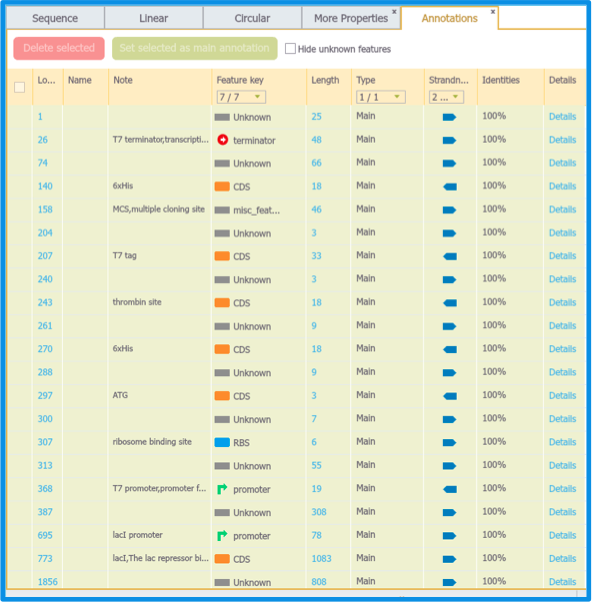 Figure 2.1.9: Auto Annotations Summary Table.
</div>
Click on the "Details" (Figure 2.1.10) to view the exact BLAST result and the discrepancies between the Sequence Hit and the Sequence Query.
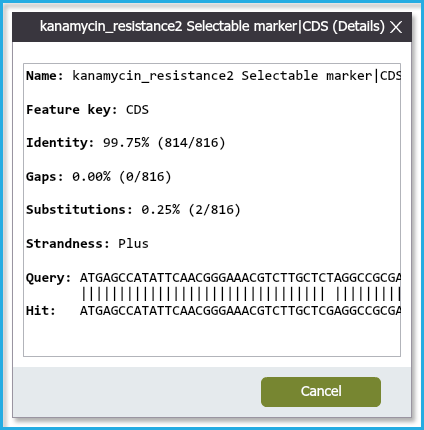 Figure 2.1.10: Details dialog.
</div>
Step 5 - Editing auto annotations
Edit the auto annotation by selecting the entry in the Auto Annotation Summary Table and then edit the Name and/or the Feature Key. (Figure 2.1.11)
 Figure 2.1.11: Edit annotation in Summary table.
</div>
Delete single annotations from the project by right clicking on the annotation in the project and selecting "Delete annotation" (Figure 2.1.12).
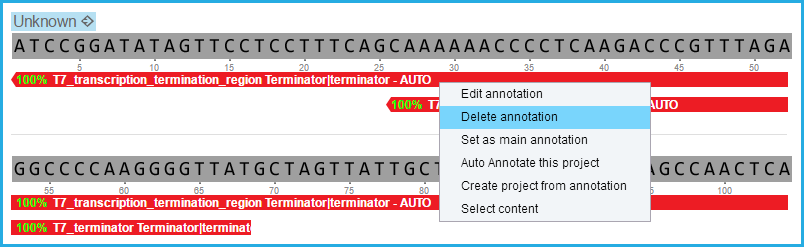 Figure 2.1.12: Delete auto annotations via the project views.
</div>
You can also delete annotations in the Annotations Summary Table by selecting an annotation and then clicking "Delete Selected" (Figure 2.1.13).
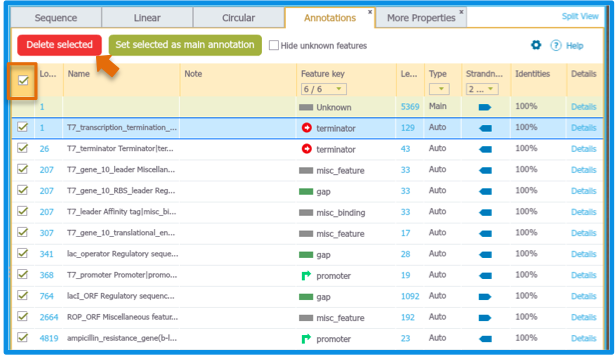 Figure 2.1.13: Deleting annotations via Summary Table.
</div>
- These actions do not delete the annotations from the auto annotation libraries, they are only deleted from the project.
Step 6 - Setting auto annotations to the main DNA layer
Select the annotation in the Auto Annotation Summary Table and then click "Set selected as main annotation" in the top left corner (Figure 2.1.13).
Or assign the auto annotations to the main DNA layer by right clicking on the annotation and selecting "Set as main annotation" from the right click drop down menu (Figure 2.1.14).
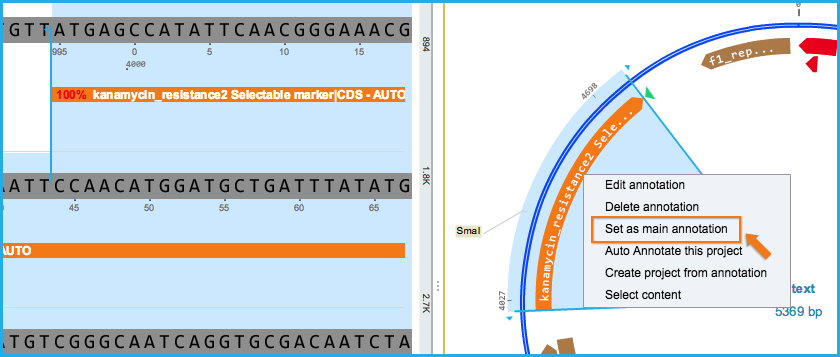 Figure 2.1.14: Setting auto annotation to main DNA layer.
</div>
This will create a new part in the main DNA layer with the new annotation name and feature key but will not alter the DNA sequence (if for example the sequence in the library was not a 100% match to the sequence in the project) (Figure 2.1.15).
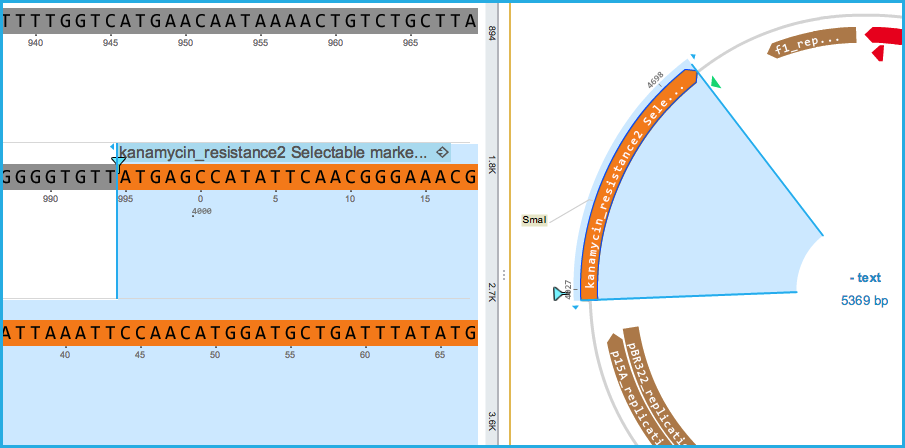 Figure 2.1.15: Auto annotation set as main annotation in the DNA layer
</div>